How to Give 20North Collaborator Access to Your Shopify Website

1. Log in to your Shopify account
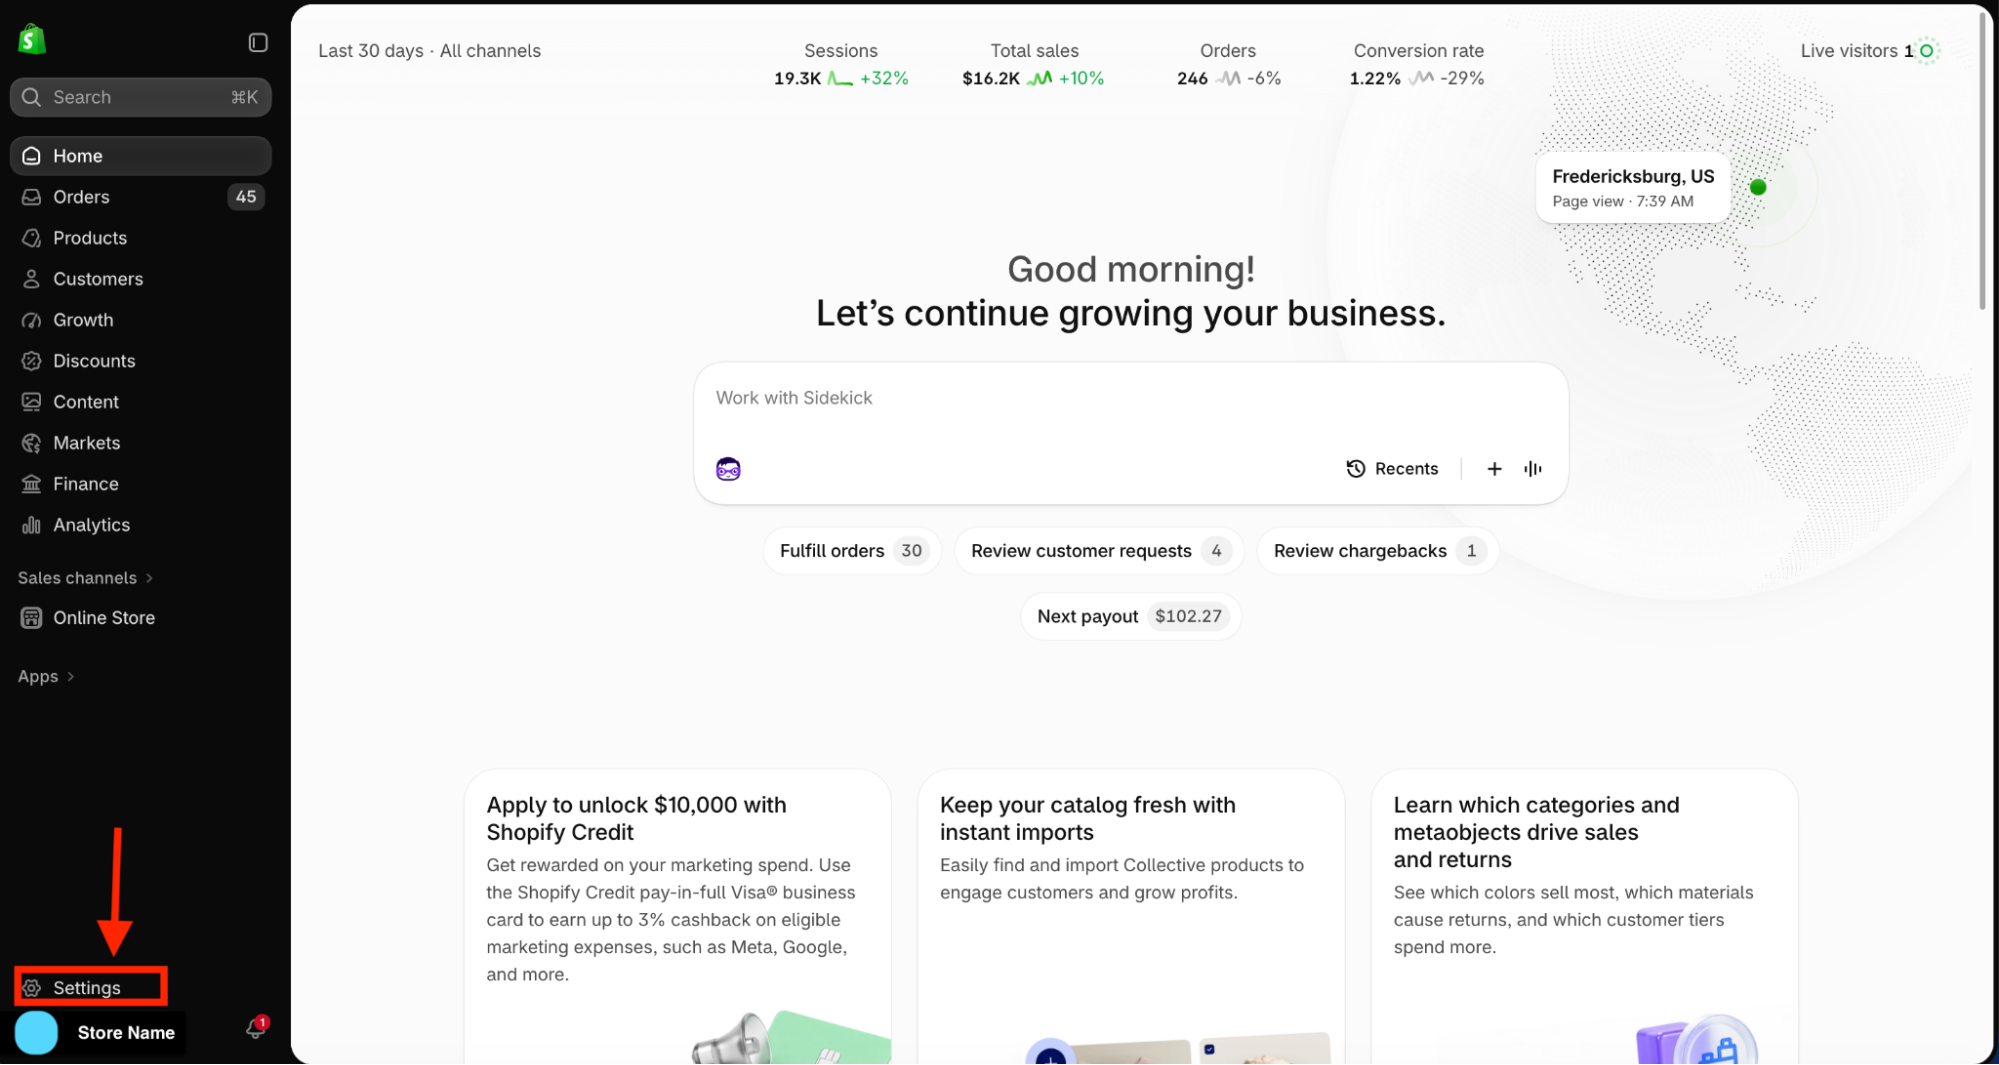
Shopify admin interface showing dashboard with sales and session stats for the last 30 days including sessions 19.3K up 32%, total sales $16.2K up 10%, 246 orders down 6%, and 1.22% conversion rate down 29%. A world map marks live visitors from Fredericksburg, US. Left sidebar menu includes Home, Orders, Products, Customers, Growth, Discounts, Content, Markets, Finance, Analytics, Online Store, and Apps. Bottom left highlights the Settings button with a red arrow and a circle indicating Store Name.

2. Click Settings, then Click Domains
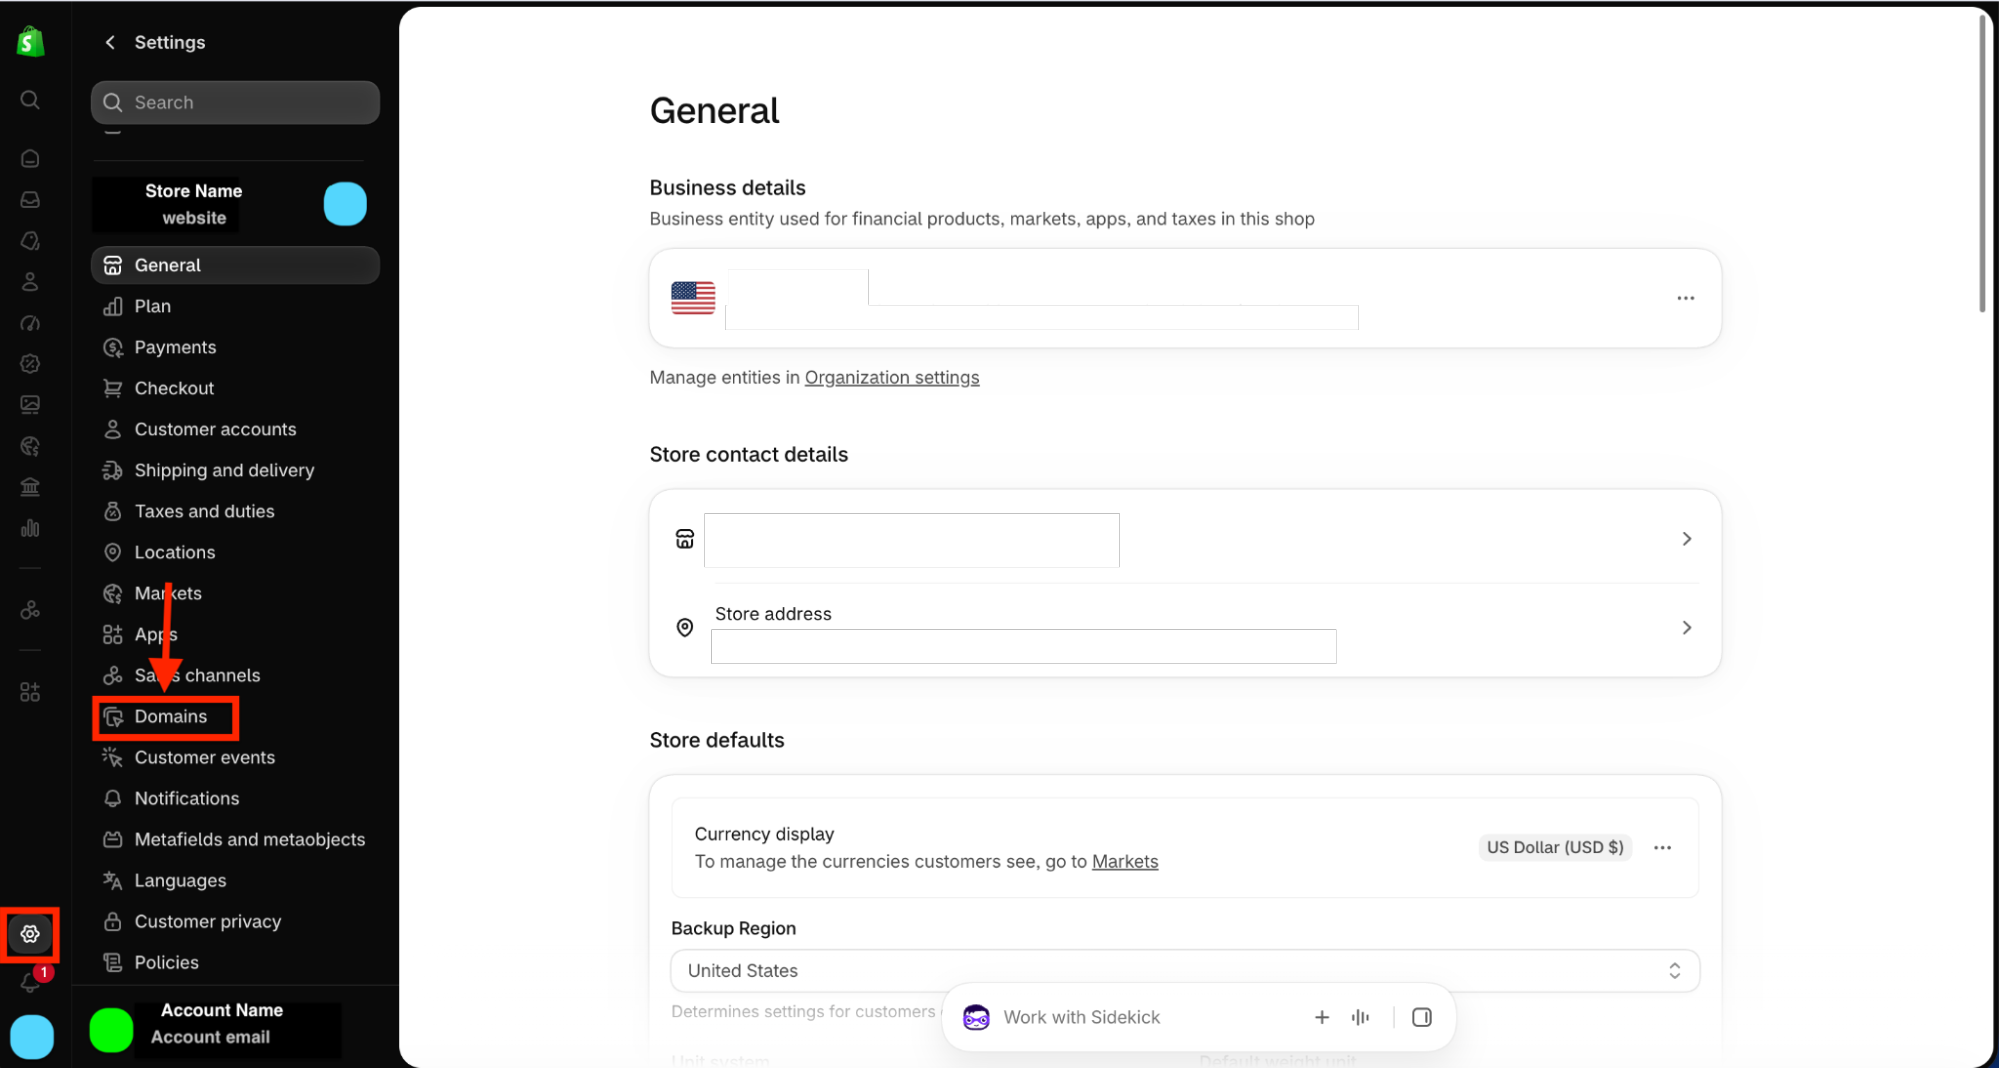
Screenshot of a Shopify settings page under the General section showing business details, store contact details, and store defaults including currency display and backup region settings. The left sidebar menu is visible with options such as Store Name, General, Plan, Payments, Checkout, Customer accounts, Shipping and delivery, Taxes and duties, Locations, Markets, Apps, Sales channels, Domains (highlighted with an orange box and arrow), Customer events, Notifications, Metafields and metaobjects, Languages, Customer privacy, and Policies. The Shopify gear icon with a red notification circle is at the bottom left. Account name and email appear below it.

3. Once in Domains, click the myshopify.com link

Shopify settings page showing the Domains section with three domain entries, all connected. The domain myshopify.com is marked as Primary with a red box and a 'CLICK' label above it. The left sidebar menu highlights the Domains tab selected under the Store Name section.

4. Copy the full myshopify.com link & save it
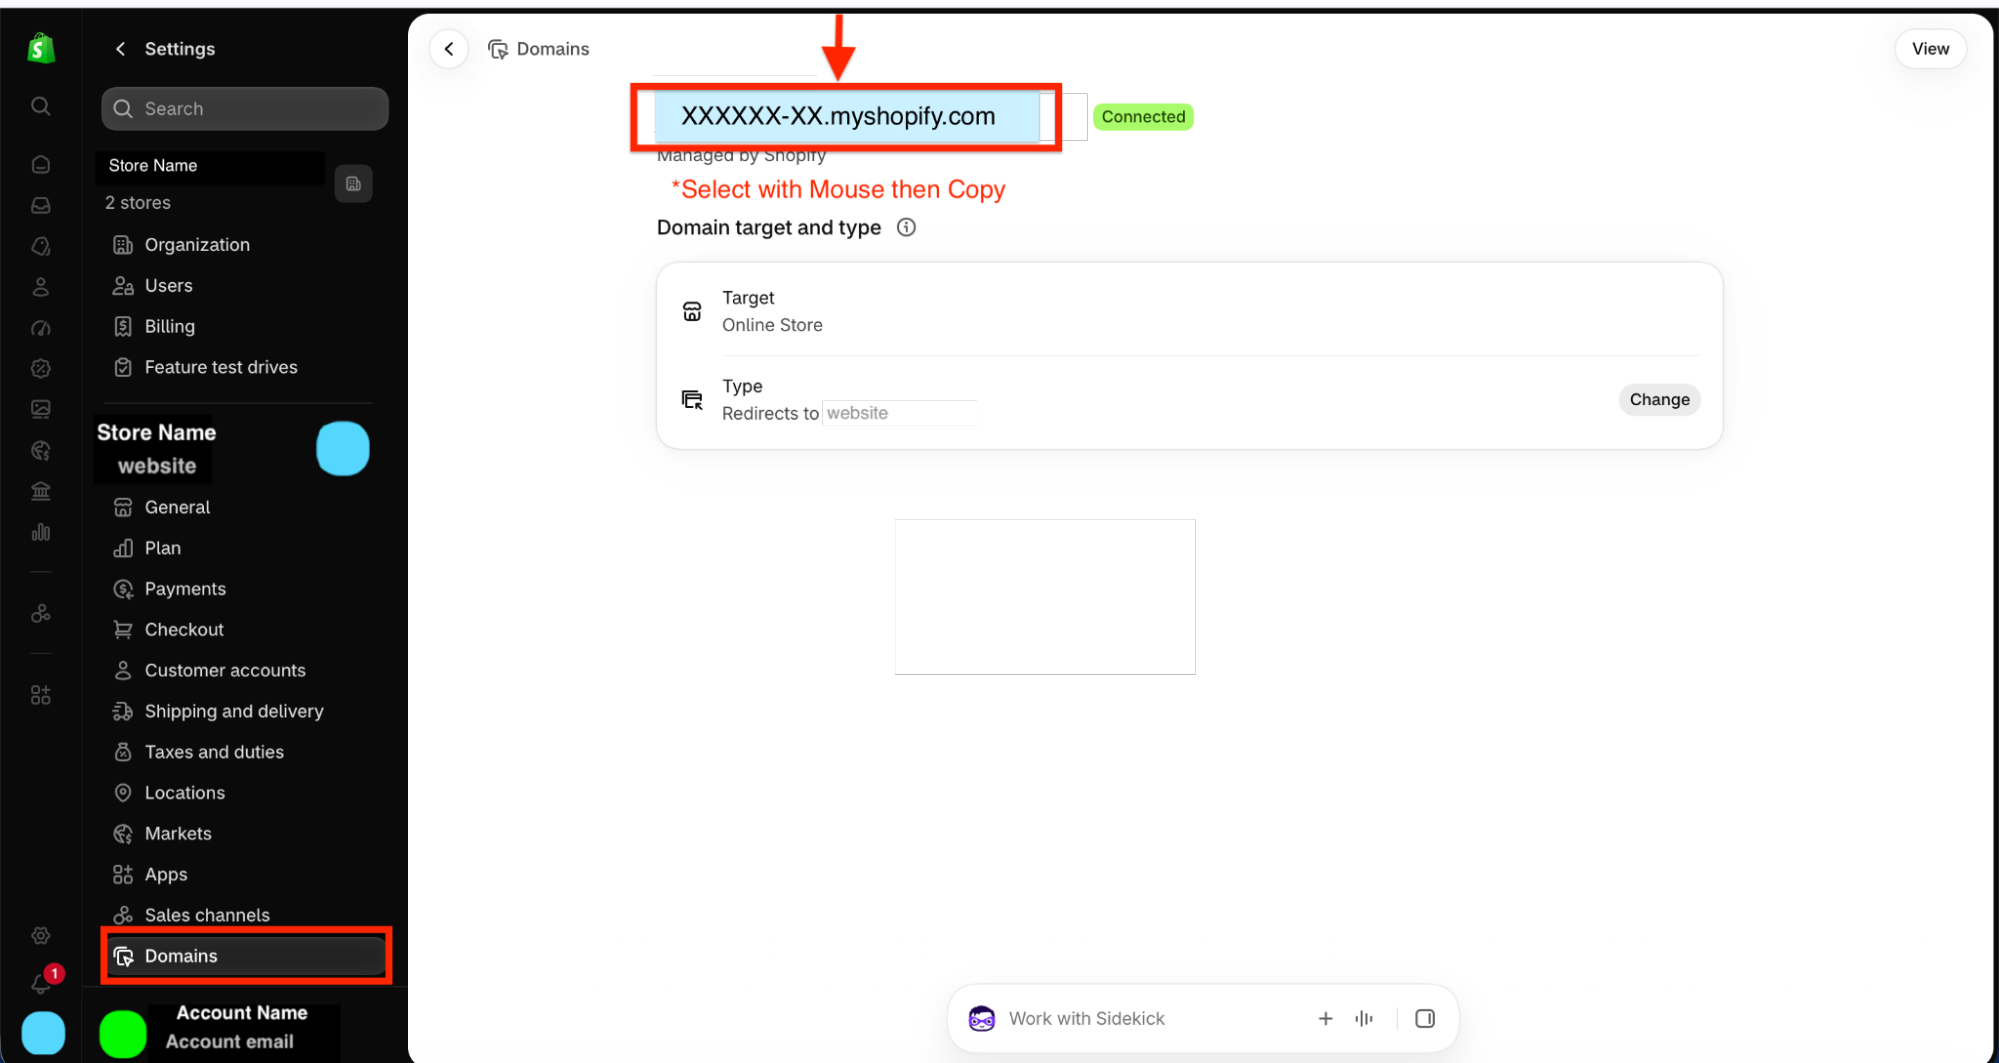
Shopify settings page showing the Domains section where a domain named 'XXXXXX-XX.myshopify.com' is highlighted with a red box and arrow, alongside a note to 'Select with Mouse then Copy'. The domain is marked as Connected. The interface also shows options for Target as Online Store and Type redirecting to a website, with the Domains menu item selected in the sidebar.

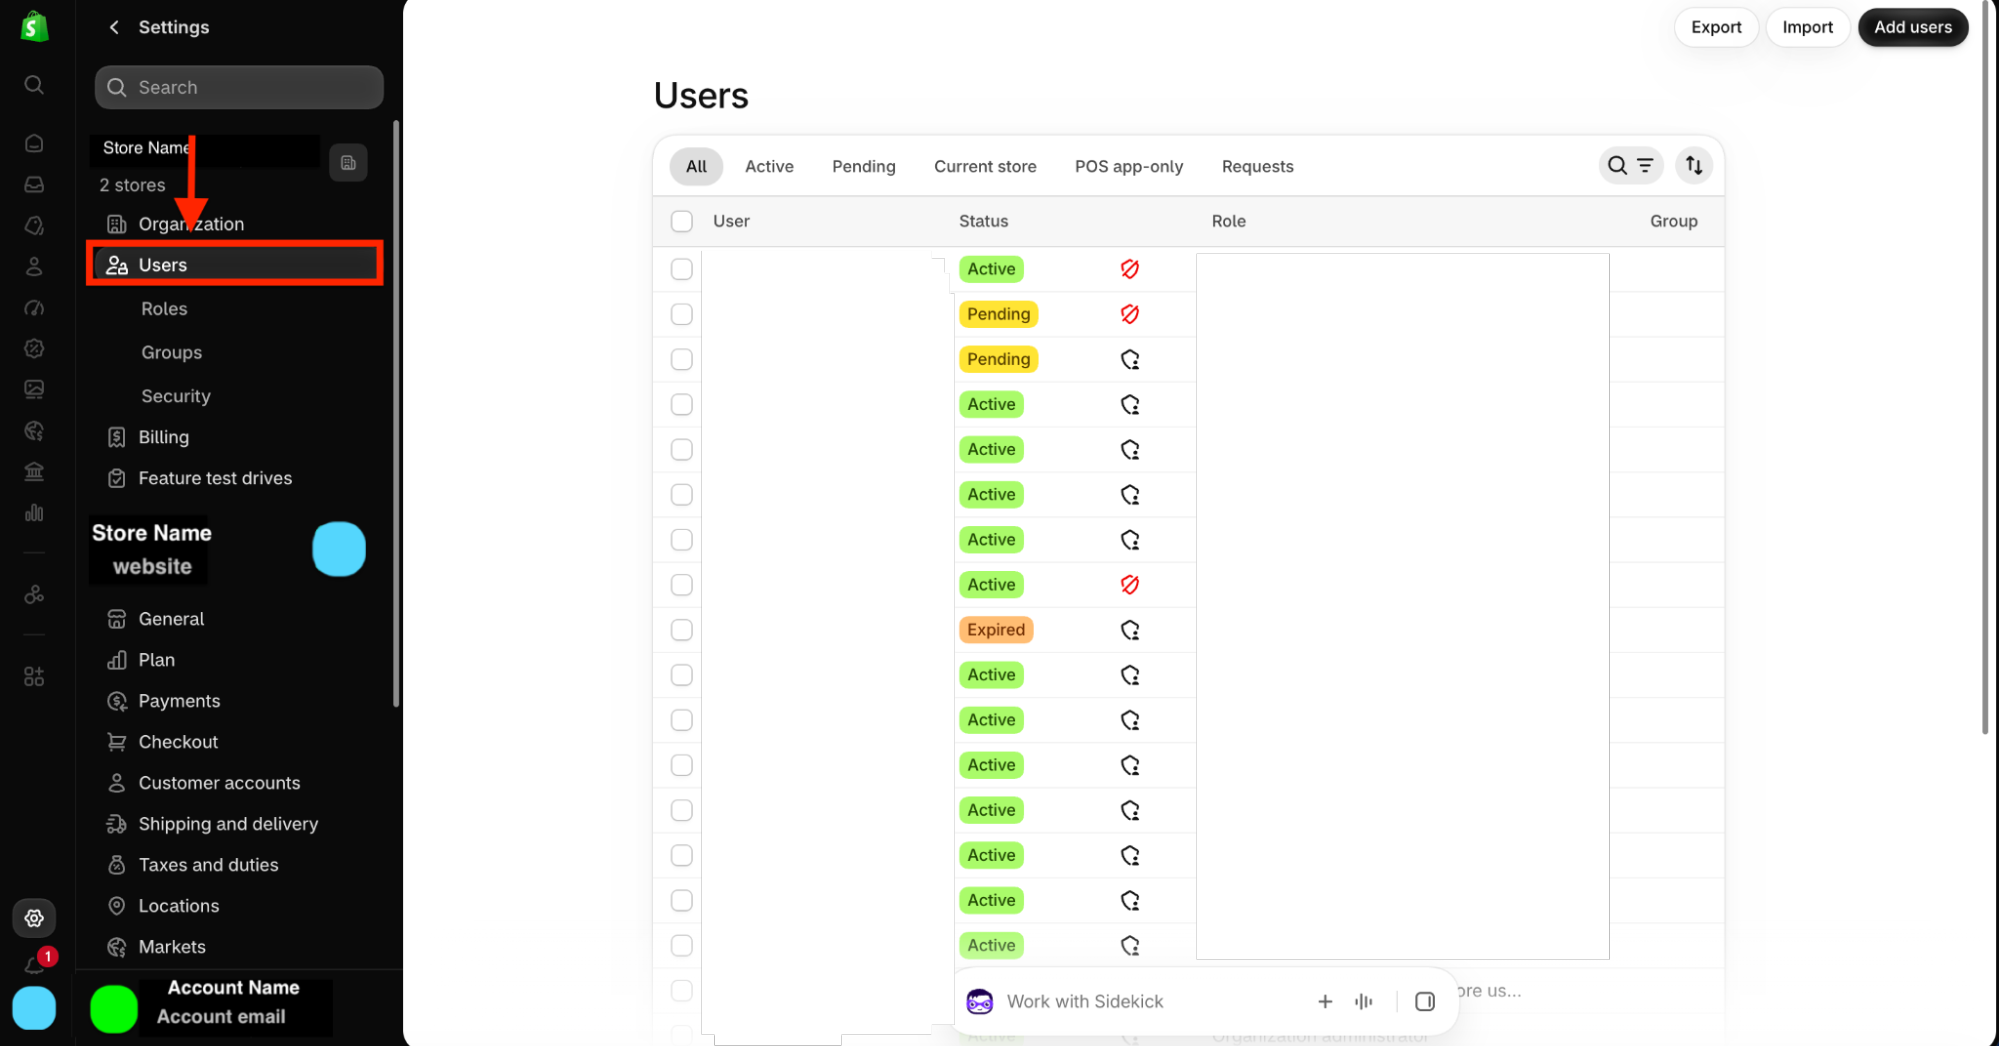
5. Go back to Settings & click Users

Screenshot of a settings interface showing the Users section selected in a sidebar menu with multiple user accounts listed in a table. The table includes columns for User, Status, Role, and Group, with user statuses highlighted in colors such as green for Active, yellow for Pending, and orange for Expired. Buttons for Export, Import, and Add users are visible in the top right corner.

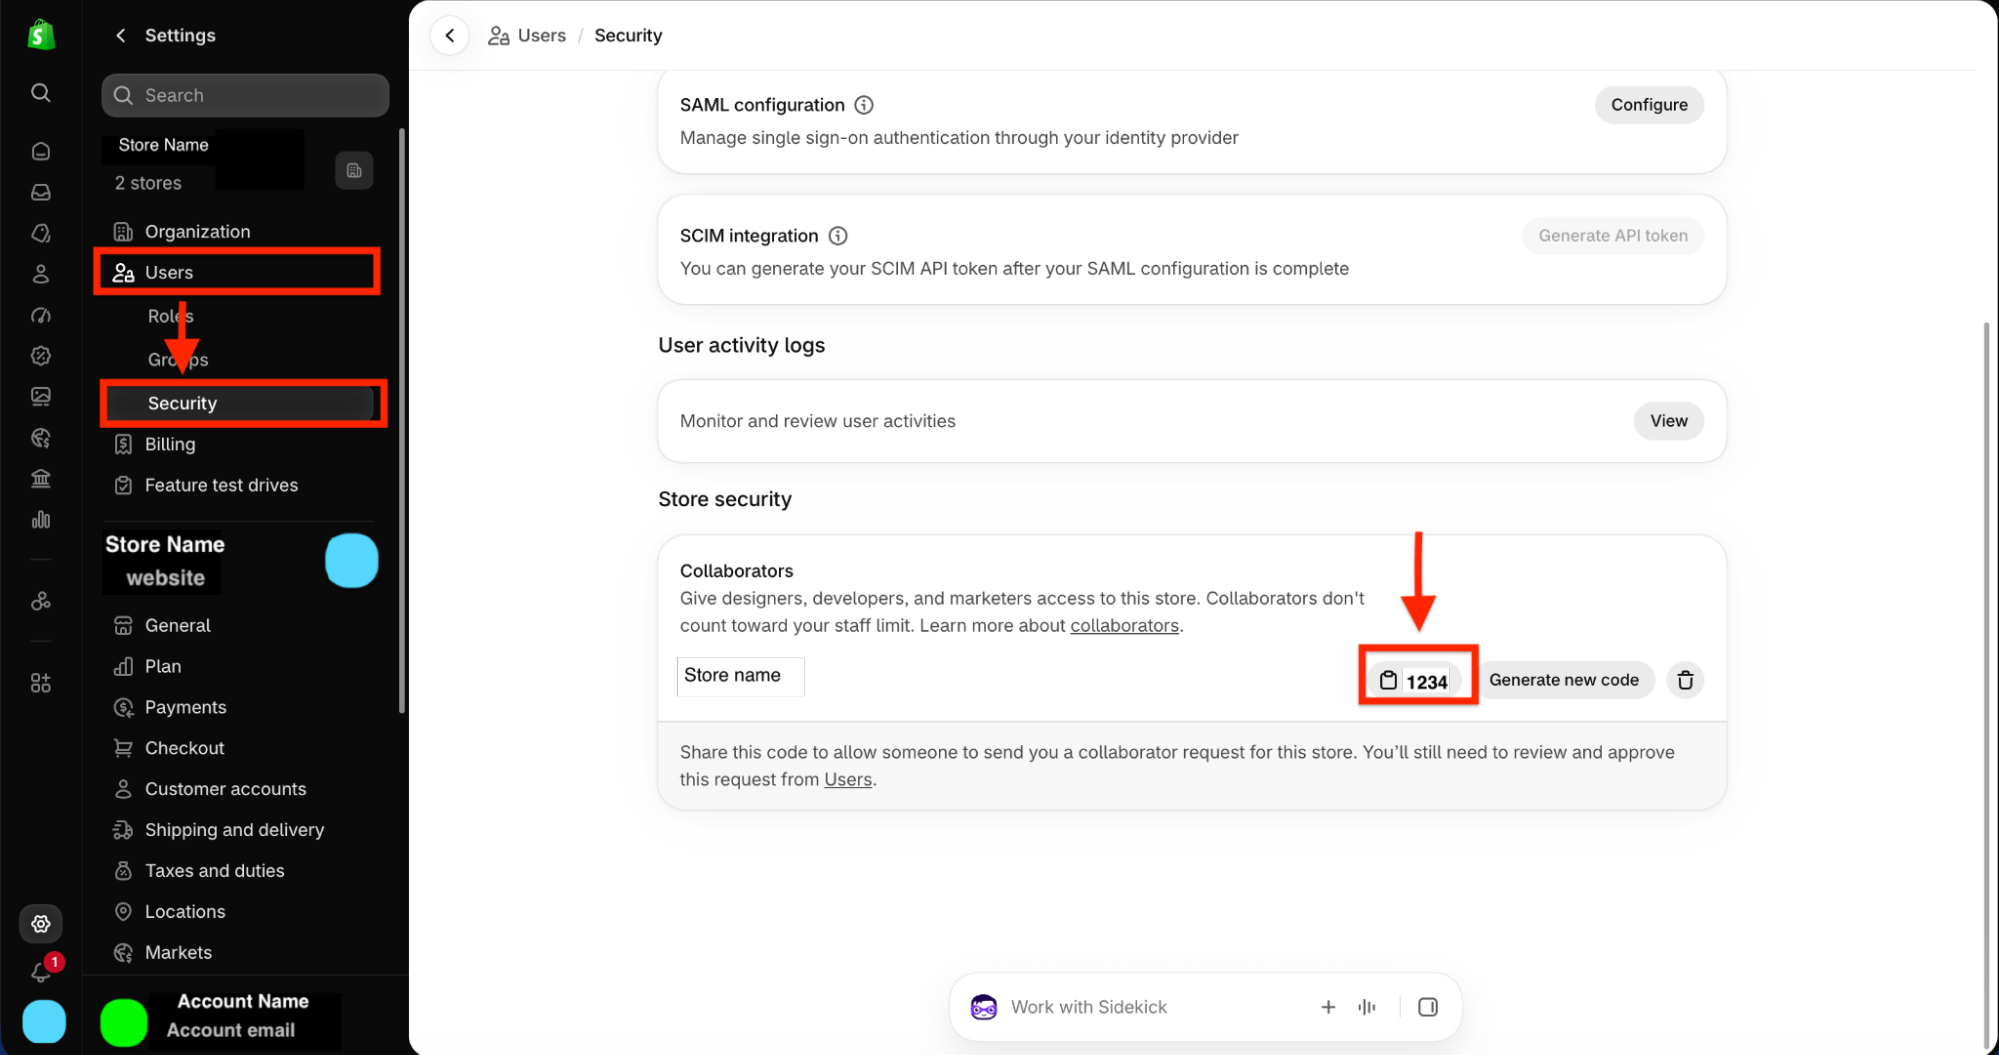
6. Click the Security tab, then copy and save the collaborator request code.

Settings screen of an e-commerce platform showing navigation menu with Users and Security selected, and Store security section on the right with a collaborator access code (1234) highlighted and an option to generate a new code.

7. Our Team will “Request Access” to your shopify store

8. Once a request is sent from 20North, check your email.

9. Click on “View Request”:

Notification that a collaborator account named Test is requesting access to a store. The user is advised to review the request, approve as-is or with different permissions, or reject if they don’t recognize the name. A green button labeled 'View request' is displayed. It explains that limiting collaborator access requests requires a store-specific code set in Shopify admin under Settings > Plan and permissions. There is a link to learn more about collaborator accounts.

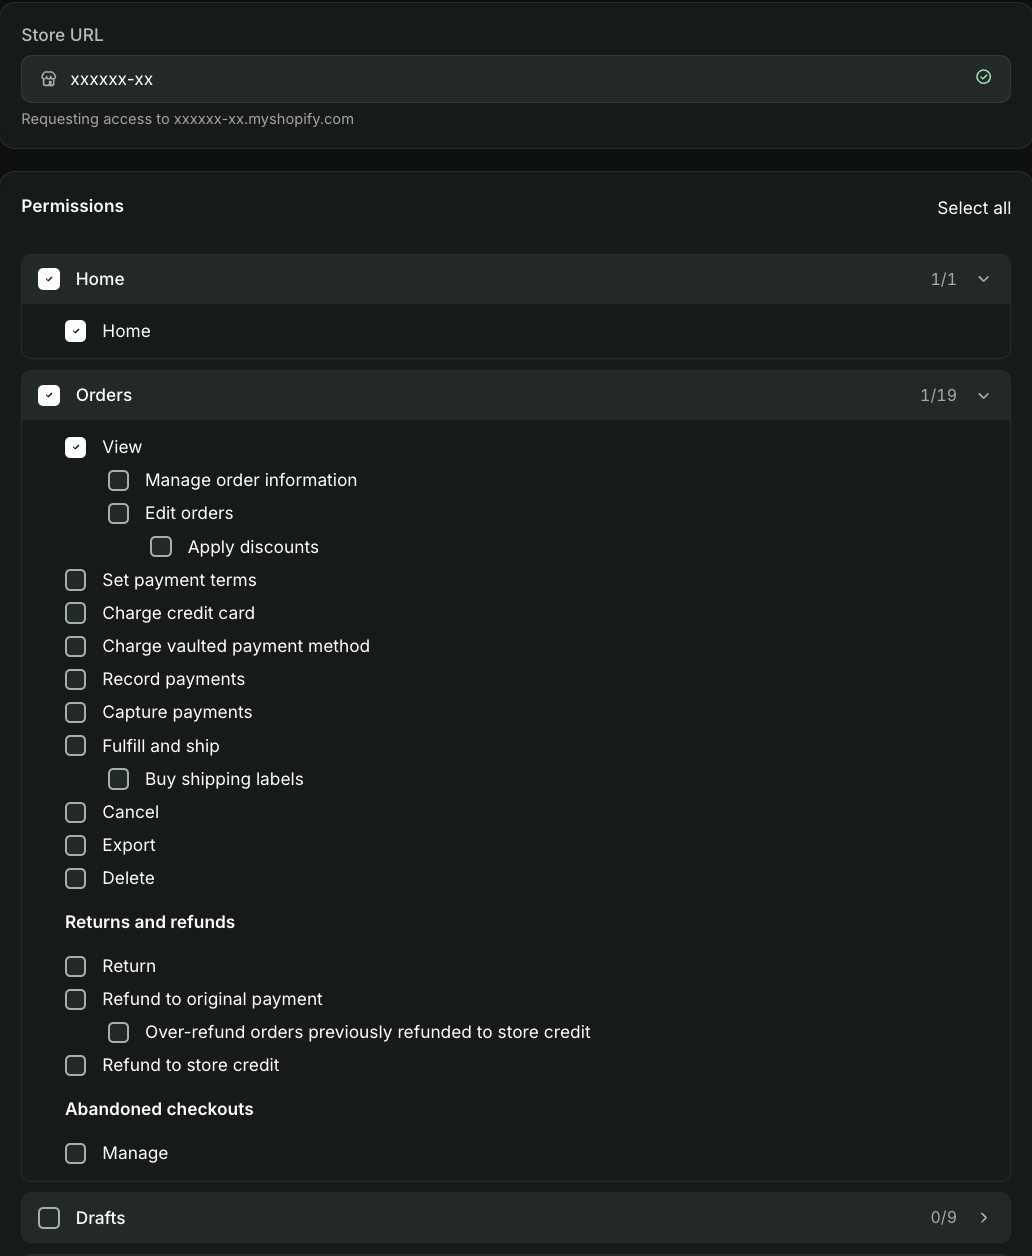
10. You will be directed to your Shopify store under “Users and permissions”

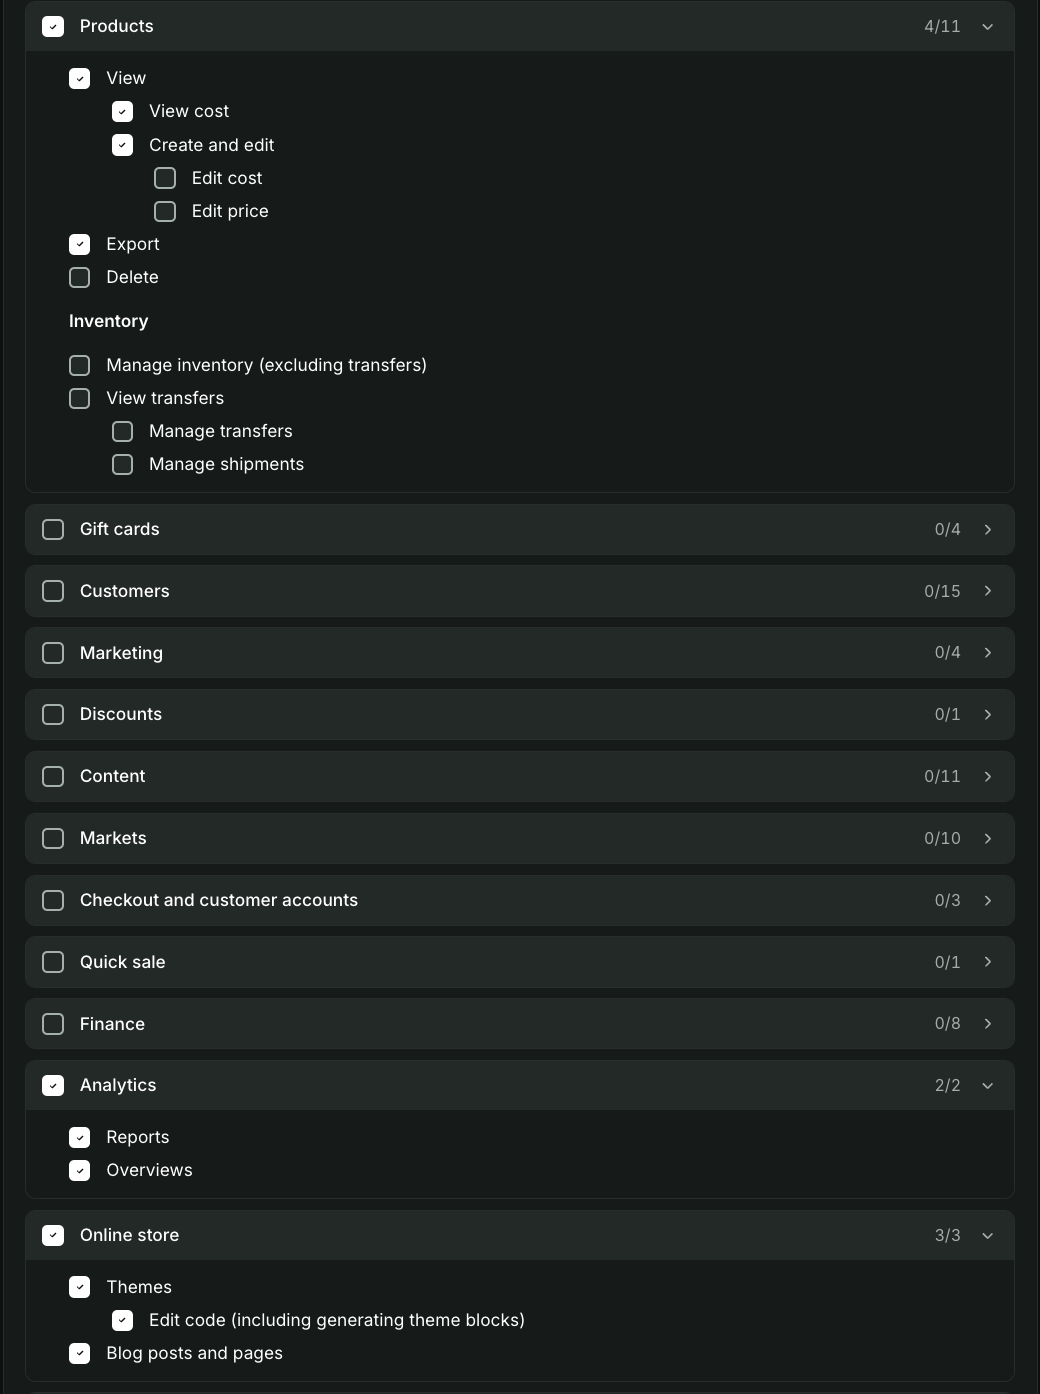
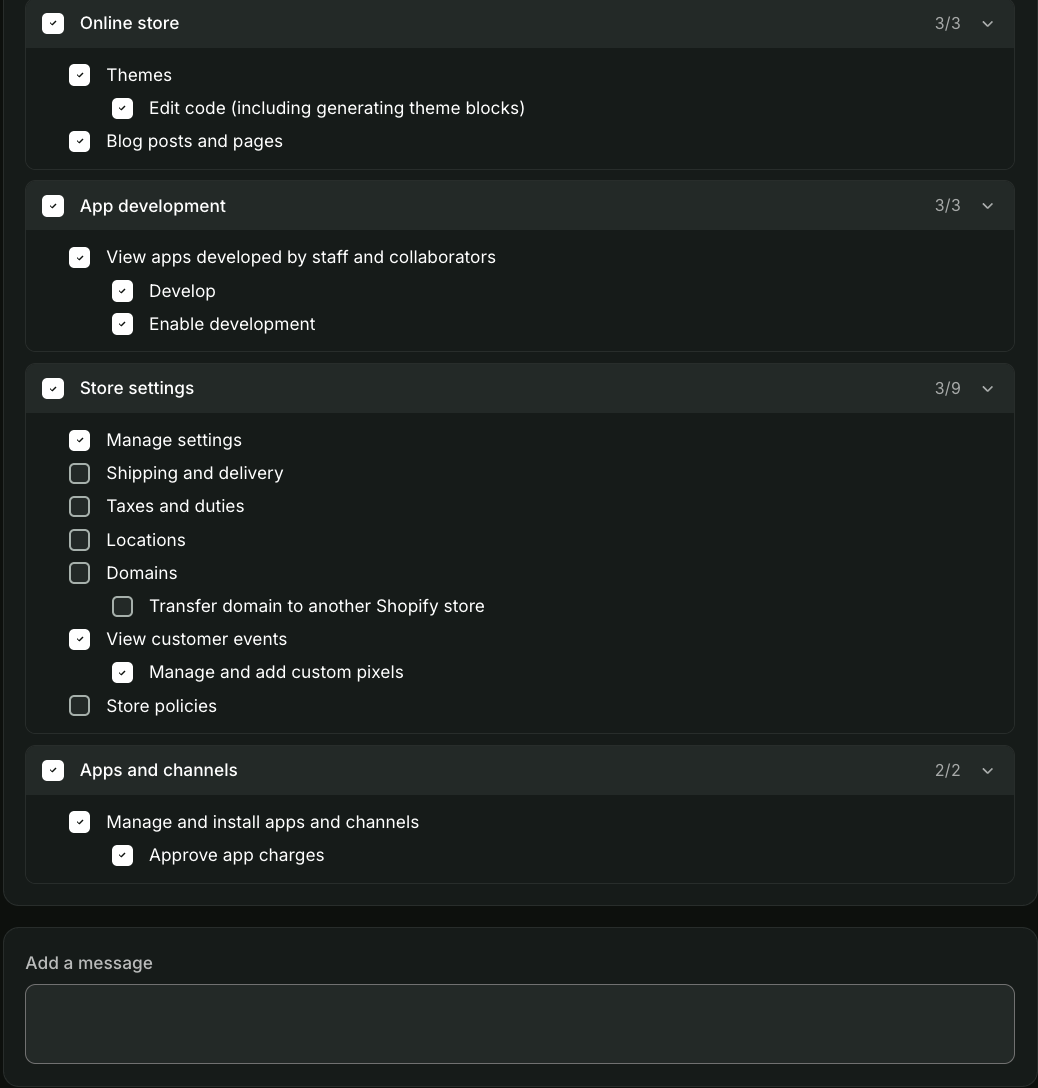
11. Our request will involve the following permissions:

A permissions checklist interface with categories Online store, App development, Store settings, and Apps and channels, showing various options with checkboxes indicating enabled permissions like editing themes, blog posts, app development tasks, managing store settings, customer events, and approving app charges; some options are unchecked. 'A permissions checklist interface with categories Online store, App development, Store settings, and Apps and channels, showing various options with checkboxes indicating enabled permissions like editing themes, blog posts, app development tasks, managing store settings, customer events, and approving app charges; some options are unchecked. A permissions checklist interface with categories Online store, App development, Store settings, and Apps and channels, showing various options with checkboxes indicating enabled permissions like editing themes, blog posts, app development tasks, managing store settings, customer events, and approving app charges; some options are unchecked. Below is a text box labeled 'Add a message.'

12. Scroll down and select “Accept request”